How to Defeat Bosses in Darkest Dungeon: Strategies and Tips
Understanding the strengths and weaknesses of bosses is essential for success in the game. This guide offers tactics for dominating all 25 bosses.
Updated by Single Player in Darkest Dungeon
General Strategy
Bosses in Darkest Dungeon are challenging opponents, but fortunately, players can prepare in advance for each encounter by picking a suitable team and selecting right skills.
It's recommended to take a well-upgraded team against most bosses, with improvements purchased from the barracks and the forge. For example, against Apprentice level bosses, it's advisable to select second-level heroes with third-level skills and equipment. Don't rush into battle - even on the hardest level, you have 100 weeks to complete the main storyline of the game.
Apart from progressing through the story, killing bosses is necessary for obtaining valuable rewards. This is the most reliable way to acquire the desired trinket.
The boss appears in the most remote room of the dungeon, and its location can be determined in advance by studying the map at the beginning of the expedition. If you are in the center of the dungeon and the most distant rooms are at equal distances, then the priority for the boss's appearance is in the bottom right corner.
Necromancer
The Necromancer is one of the first bosses you'll encounter in Darkest Dungeon. He is among the simplest to defeat, and almost any team composition can deal with him. However, it's advisable not to rush into battle against him. Instead, wait until the expedition reward includes the most useful orange trinket. A high chance of stunning, poisoning, and debuffing will significantly ease the further progression of the campaign.
Unlike many other bosses, the Necromancer only performs one attack per round. He compensates for this by summoning a random skeleton after each action. Once the boss is defeated, all his minions will disappear.
Team selection:
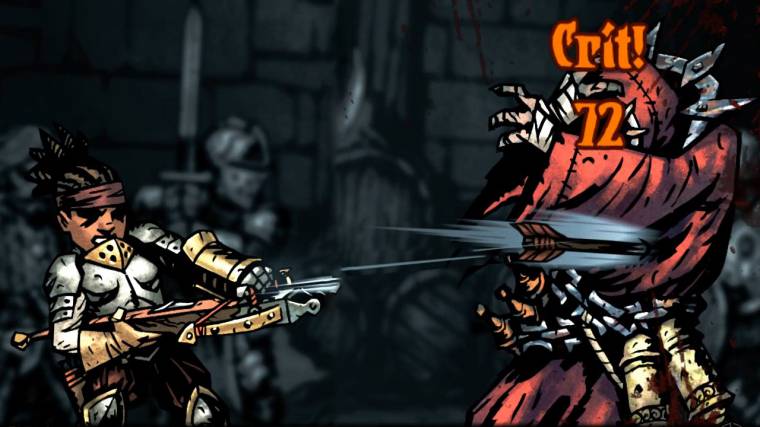
Since the Necromancer performs only one action per round, marks stay active for longer durations. Consequently, the Arbalest and Houndmaster classes are particularly efficient for this fight. Both classes can deal damage to the fourth position, where the Necromancer often finds himself after the third round.
For the front ranks, both the Hellion and Shieldbreaker are suitable choices. They can strike at the furthest positions using the skills Iron Swan and Puncture, respectively.
The Crusader is an optimal choice for the front positions. He inflicts additional damage to undead and can stun the skeletons.
Video: Arbalest shooting a mark
Prophet
Following the Necromancer, the Prophet is the next boss encountered in the Ruins. Hiding behind wooden pews, he inflicts immense damage with stone boulders.
Each turn, the Prophet starts with a Prophecy, providing heroes a chance to brace for the imminent barrage of falling rocks. Besides this attack, the Prophet can also inflict minor stress damage, stun, or poison your fighters.
To engage the boss in close combat, you should consider destroying the pews located in positions 1-3. For each pew destroyed, you will receive 2,500 gold. Alternatively, you can focus on dealing damage directly to position 4, where the Prophet resides, if your fighters can reach that far.
Team selection:
The Man-at-Arms is almost indispensable in this fight. His high health and defense make him well-suited to endure the boss's onslaught. Using the Defender skill, he can redirect the Prophet's attacks from his teammates onto himself. The Guardian's Shield trinket, particularly effective in position 4, grants the Man-at-Arms additional defense bonuses.
Having a Houndmaster in the team is beneficial, especially when the Prophecy targets two heroes simultaneously.
The Leper is also a strong choice for this battle. His potent physical attacks can swiftly demolish the pews, and he can heal himself if needed. In the initial stages of the fight, while the Man-at-Arms is fortifying his defenses, the Leper's Intimidate skill can help mitigate the boss's attack power.
For a strategy focused on quickly eliminating the boss without destroying the pews, the Hellion, with her Iron Swan skill, proves to be the best choice for the front rank.
Video: Standard team for Prophet fight.
Hag
The Hag is arguably the most dangerous boss in the basic four regions of Darkest Dungeon. The risk of losing a hero, or even the entire team, is exceptionally high. Her ability to cast a hero into the cauldron rapidly depletes his health, leaving little opportunity for healing or escape.
The Hag and her cauldron always occupy specific positions and are immovable. Moreover, it's practically impossible to destroy the cauldron; an empty cauldron is invulnerable to attacks.
Casting a hero into the cauldron is the Hag's primary skill, and she employs it first. As soon as one hero is released, another (or sometimes the same one) is immediately thrown into the cauldron. The ensnared hero suffers damage equal to 8.75% of their maximum health every time either the Hag or the player begins a turn, totaling 43.75% per round.
Given these challenges, the Hag must be eliminated as swiftly as possible, ideally within two rounds. Utilizing bonuses from trinkets, positive quirks, and camping skills is crucial. An event that grants a 15% damage boost can be especially beneficial.
In the battle against the Hag, it's advantageous to extinguish torches to increase the critical hit chance. However, it's better to douse the torches only after the Hag has thrown a hero into the cauldron, as good lighting might helps to dodge this move.
Team selection:
Hellion can deal high damage to distant positions, and his trinkets and camping skills allow for more frequent critical hits.
Highwayman's Riposte is highly effective, since the Hag often targets the entire team.
Bounty Hunter deals physical damage to the third position with his Finish Him skill. One of his camping skills enhances damage against large enemies, which is also useful in this fight.
Occultist as a healer will be preferable to a Vestal because he can deal some damage and is not useless in the front position.
Characters that deal damage to marked targets are less effective - the mark quickly fades due to the Hag acting twice per round.
Video: Dealing with the Hag as fast as possible.
Brigand Cannon
The Brigand 8-Pounder, the second boss of the Weald, is not known for a variety of moves. However, if its single shot is left unattended, it usually brings all heroes to death’s door.
The key tactic against this boss involves neutralizing the Matchman every turn. Without him, the Brigand Cannon is incapable of dealing any damage. Once the Matchman is handled, shift your focus to the boss itself. It's more effective to stun, rather than kill, the other enemies, as reinforcements arrive every round.
Team selection:
Bounty Hunter can stun enemies in positions 2-4, where the Matchman always appears. He also deals additional damage to Human enemies.
Vestal will help in battle by stunning enemies and bringing entire team back from death's door after a Cannon shot.
Shieldbreaker might seem like an ideal match against the cannon since she is one of the few who can pierce enemy PROT. However, this ability does not work as expected against the Cannon and doestn't ingone it's armor completely. The Shieldbreaker can still be useful for reaching the Matchman in any position.
Hellion and Highwayman, like in many other fights, are great against the boss. Their reach and high damage almost quarantee to kill the Matchman in one action.
Classes with poisoning and bleeding abilities are ineffective in this battle - the Cannon has absolute immunity to status effects.
Video: Do not let a single cannon shot through.
Swine Prince
The Swine Prince, King, and God, bosses of the Warrens, are actually subservient to a piglet named Wilbur and carry out his commands.
Wilbur marks players with a small chance of stunning. He has very little health, and it might seem logical to assume that killing the piglet first would simplify the fight. However, the developers of Darkest Dungeon played a dirty trick - if you kill Wilbur first, the larger Swine will deliver a devastating blow to the entire team. The heroes on the team warn of this danger, and an attentive player will quickly understand that it's not advisable to target Wilbur prematurely.
Team selection:
Houndmaster deals bonus damage to beasts. The mark set by him lasts long as the Swine acts only once per round.
Arbalest is necessary at the highest difficulty level of the boss when the damage from Wibur's marks is too high, and the healer can't keep up. Arbalest clears marks and stuns with her Rallying Flare skill, which significantly simplifies the fight.
Vestal is recommended as a healer; frequent healing will be necessary, and her healing is more consistent compared to Occultist's.
Video: Hitting our own marks and removing others.
Flesh
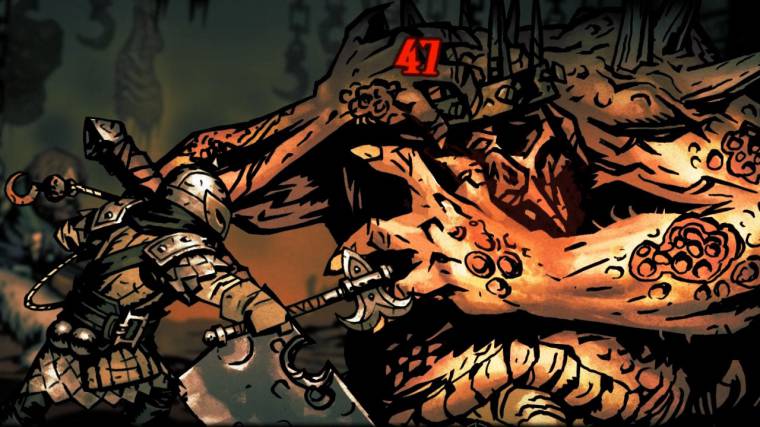
The Flesh, formed as a result of the Ancestor's failed experiments, awaits you in the Warrens after your victory over the Swine. The boss is a mixture of random enemies that heal, deal damage, or stun. The boss can be troublesome if it decides to repeatedly bite and trample the same fighter.
The boss's mechanics are unique - the four enemies share one health pool. Attacks that deal area damage will be most effective. It's also wise to target those parts of the Flesh with less protection. The Flesh has low Bleed resistance.
Team selection:
Houndmaster will deal the most damage with his Hound's Harry ability, which adds bleeding to all four parts of the Flesh.
Flagellant and Jester are good candidates to participate - they have skills that cause bleeding to two targets.
Include the Impale skill if you have Shieldbreaker in the team for another AoE damage source.
Video: Practical demonstrations of the hound's rush.
Siren
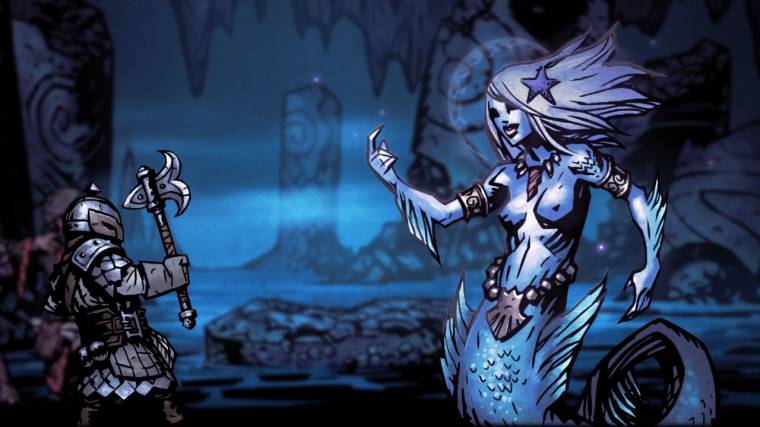
The Siren's unique feature is her ability to charm heroes to fight on her side. A charmed hero will use random skills.
The chance of a fighter being captured by the illusion is 70%, and nothing in the game lowers this parameter. However, the Siren targets fighters with low debuff resistance, which can be countered by having three "key" fighters drink Holy Water.
Team selection:
In this fight, all support classes are beneficial. It's risky to take fighters with high damage output since they can turn against you.
The team can include Occultist, Vestal, Jester, Man-at-Arms, Plague Doctor, and even an Antiquarian, although such a battle will not be quick. Plague Doctor and Vestal are useful as they can safely stun a charmed ally for a turn.
Houndmaster and Arbalest won't cause much harm - without a mark, their main attacks are weak. It's wise to use the Dog Treat when an enemy has charmed another ally, creating a safe window for attacks.
Taking a Leper is not recommended. Firstly, he can deal significant damage to his own fighters. Secondly, after the charm wears off, he will end up in the fourth position.
Updated:
The Siren charms heroes with the lowest resistance to debuffs. You can take any classes, even those with high damage, if you are prepared to control the debuff resistance on your heroes with Holy Water.
Video: The Siren charms Bounty Hunter (I forgot to use the Holy Water).
Crew
The Crew, drowned by the Ancestor's misdeeds, will try to drag you to the depths.
Team selection:
Almost any composition is suitable for this battle, but it's important to consider that heroes will periodically find themselves in the front position, so skills should be distributed accordingly.
Occultist can heal even from the front position and his high stun chance can postpone the Anchorman's attack by 1 round.
Highwayman can usually deal with the anchor with a single Point-Blank Shot.
Leper is effective in the front positions and can help deal with the Anchorman faster than others.
Arbalest will be in a difficult position when pulled forward. The effectiveness of her mark against the team's two turns is low.
Video: Dealing with the Crew.
Shuffling Horror
The Shuffling Horror awaits adventurers at the end of the first Darkest Dungeon mission.
The boss itself is not excessively difficult; however, the real challenge lies in navigating the small maze to reach it. Cultist enemies encountered along the way deal significant stress damage. Stock up on bandages - many physical attacks cause bleeding.
Although the Shuffling Horror bears a visual resemblance to the Shambler, its tactics differ significantly. It does not summon tentacles; instead, its initial ally is a Cultist Priest. It's not advisable to kill the priest, as doing so will prompt the Flesh to summon a more powerful enemy: Defensive Growth.
Team selection:
To reach the boss without suffering a nervous breakdown, it's a good idea to take a Jester. At the beginning of each battle, increase attack parameters with Battle Ballad, and then recover stress with Inspiring Tune.
The Highwayman with the Riposte ability is excellent against the monks, who often attack the front two positions. In the final battle with the boss, his mobility will be especially useful.
Video: No afflicted heroes thanks to Jester.
Templars
Defeating the Templars (Scorpions) in the second Darkest Dungeon mission requires equipping talismans obtained from the previous expedition. Without them, heroes will be brought to death's door and the brink of a nervous breakdown after a couple of the Templars' Revelations.
Given that there are only three talismans available, one hero will be in great danger and will need protection from Man-at-Arms or Houndmaster.
Team selection:
Man-at-Arms is one of two classes capable of protecting allies. He excels at this task while also parrying incoming attacks. He will be even more reliable in the fourth position, boosting the team's morale with skills Command and Bolster.
Houndmaster's role in this mission is invaluable: he deals additional damage to beasts, can protect someone if necessary, or stun enemies. In less intense battles, moving him to the third or fourth position allows him to effectively restore stress.
Video: Lucky crits, very fast fight.
Mammoth Cyst
Mammoth Cyst and White Cell Stalk are the main threats in the third Darkest Dungeon. You'll need to confront this boss setup at least twice: the final encounter is located in the center of a vast map, and another encounter will arise en route. To avoid wasting energy and time searching for the correct room, you can look at the expedition map. The shortest path involves just a few battles.
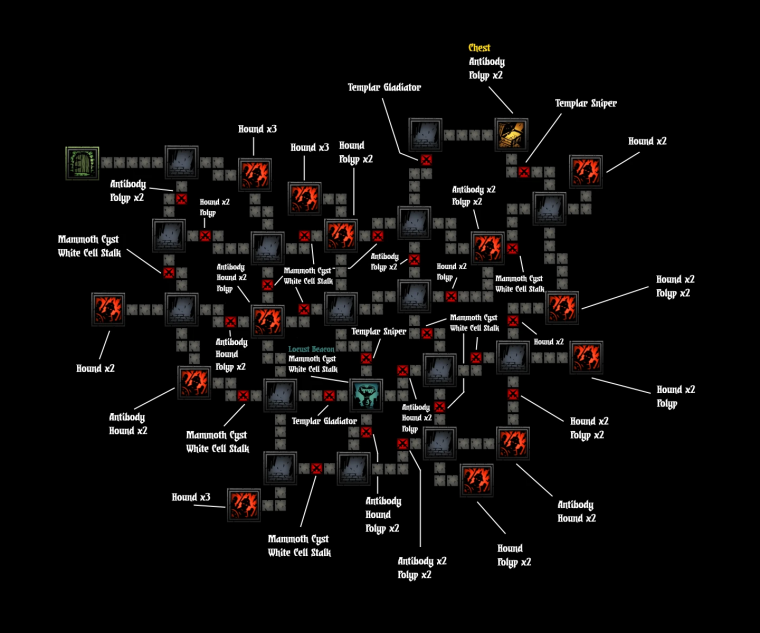
The Mammoth Cyst inflicts significant damage, along with debuffs and poison (stock up on antidotes and medicinal herbs). Its most troublesome feature is the White Cell Stalk's Teleportation ability, which can transport you to a random room on the large map. You'll have to navigate back to the center, battling dangerous creatures along the way. Fortunately, the boss's health does not regenerate during this time.
The strategy against this boss involves quickly eliminating the White Cell Stalk. You can kill it on the second turn because it does not use teleportation on the first turn. This approach is risky but allows you to deal more damage to the Mammoth Cyst.
Team Selection:
Hellion is the best candidate for this mission. She can take out the Stalk in one hit with Iron Swan. However, she'll need buffs from camping skills - Sharpen Spear and Battle Trance. The Plague Doctor's Emboldening Vapours buff is excellent: 50% damage increase ensures a higher chance of killing the Stalk, and +10 to speed allows her to act before allies, so they can finish off the Stalk if needed.
Take Houndmaster along if possible, as he deals additional damage to beasts, aiding both in navigating the labyrinth and finishing off the Stalk.
Plague Doctor is great on this mission for boosting the Hellion's attack power. Her stunning skills will also be valuable after she spends two turns on Emboldening Vapours.
Videos:
1.
Plague Doctor, Vestal, Leper and Hellion:
https://youtu.be/mOjABdQs5NE
2.
Arbalest, Occultist, Houndmaster and Hellion:
https://youtu.be/liQ1QU3gNbg
The Collector
The Collector is one of the simpler bosses in Darkest Dungeon, but he can still pose a challenge to an unprepared or weakened team. The Collector may appear in place of a corridor enemy if your inventory is more than 75% full (13 or more slots occupied).
The Collector's attacks don't deal much damage and he acts only once per round. The main threat in a battle against him are the heads he summons, particularly the Highwayman heads, which deal significant damage. The primary strategy is to stun these heads while focusing the main damage on the Collector. If two Highwayman heads appear at once, killing at least one becomes essential.
The reward for defeating the Collector is either a gem worth 3500 gold or a unique trinket (if you don't already have it).
Team Selection:
Given that the Collector can appear in any basic location, you should be prepared to encounter him with any composition of heroes. Ideally, your team should include a healer, a hero capable of stunning, and someone who can deal damage to the farthest, fourth position.
Video:
The Collector as a first fight:
https://youtu.be/N2vwClAOBd8
Shambler
A separate guide is written about this boss, you can read it here:
Future link placement
Brigand Vvulf
The Wolves at the Door event randomly appears if you have at least 4 heroes of level 5 or higher. This new expedition leads to a dungeon consisting of seven rooms, with Brigand Vvulf awaiting in the furthest one. Ignoring the expedition results in the destruction of one of your building upgrades in Hamlet.
Stock up on all the shovels - although there are few rooms in this expedition, corridors are often barricaded. Also, be prepared for many enemies on the way to the boss dealing stress damage.
The battle with Vvulf involves him throwing a bomb at your party every turn and then summoning brigands, occasionally increasing the stress of two team members with his shout. He always guards one of the brigands.
To prevent the event from recurring, you only need to defeat Vvulf once.
Team Selection:
Man-at-Arms is an essential member of this battle. By redirecting damage from all grenades to himself, he can increase his defense up to 80%. The Guardian's Shield in position 4 is highly recommended.
Leper can deal substantial damage. Although the boss is in position 3, you can hit him by attacking the guarded brigand.
A hero capable of stunning from rank 2 is useful to neutralize one of Vvulf's two brigands. Occultist is good because he can heal when necessary. Crusader, in addition to stunning, can reduce stress for heroes on the brink of a breakdown.
Jester is recommended for the journey to the final room, countering the many stress-inducing enemies along the way.
Houndmaster's guard ability is less effective in this battle due to the impossibility of dodging grenade explosions.
Highwayman is less effective in this battle since Vvulf's grenades and shouts do not trigger ripostes.
Video: Man-at-Arms’ Impenetrable Defense
Shrieker
The Shrieker steals trinkets from the estate once per campaign, and those lost in battles can also be found in its nest. This way, you can always retrieve valuable trinkets.
To complete the quest successfully, you only need to survive for 4 turns. Killing the boss is not necessary; the rewards are the same, except for the difference in stress received during the Shrieker's final attack. However, you will receive a monetary reward if you destroy the Nest.
If you do decide to kill the Shrieker, consider its high 63 dodge. You'll need trinkets and hero skills that increase accuracy.
Team Selection:
If you decide to kill the Shrieker, the following classes show themselves in the best light:
Houndmaster with his bonus damage against beasts. His Dog treats will last for the entire fight.
Jester or Man-at-Arms will increase the party's accuracy. The Man-at-Arms is good for providing protection in tough situations, while the Jester can deal significant damage with his Finale on the fourth round.
If your goal is merely to survive 4 rounds, prioritize healing classes and those with higher health, such as the Leper, Man-at-Arms, and Crusader.
If you need the money from selling gemstones and decide to disturb the Shrieker's Nest, it will be sufficient to take a couple of heroes who can hit distant positions. High accuracy is not mandatory.
Video: Killing Shrieker before it flies away.
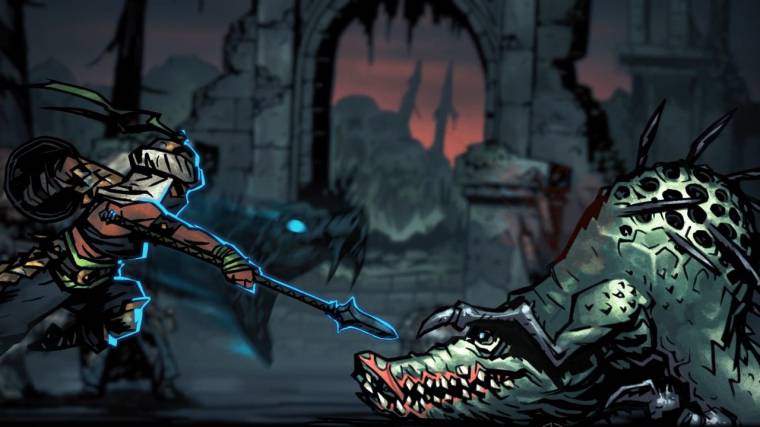
Crocodilian
The Crocodilian is the first boss you encounter in the Crimson Court's corridors. At higher levels, you will face it several times more.
The Crocodilian is a dangerous boss, and an unprepared team is likely to suffer losses. Its most threatening attack, Apex Predator, can deal massive damage to three heroes at once, often bringing them to death's door. The battle tactic against this boss is to avoid this attack. Apex Predator is only used after Submerge, which can be done in positions 2 or 3.
Team selection:
To defeat the Crocodilian, select heroes capable of pulling the Crocodilian to the safer position 1.
Shieldbreaker is the best candidate for the battle against the Crocodilian. She can pull it to the front position with her Puncture attack and protect herself from critical attacks with Serpent's Sway.
Bounty Hunter can stun the boss and deal damage even from the third position in addition to pulling to rank 1 or pushing to rank 4 with his two move skills.
Occultist, while not as effective at pulling due to position limitations, brings a variety of other skills to the battle (stun, mark, dodge debuff) and can heal allies.
Plague Doctor's Disorienting Blast can not only move but also stun the boss.
If you fail to avoid the Apex Predator attack, you will need to heal the entire team, and the Vestal is the one who can do this effectively.
Highwayman is useful for riposting the Crocodilian's frequent attacks. Make sure he has at least one close-combat attack active to hit the first position.
Video: Preventing Apex Predator at all cost.
Baron
Amidst the roar of applause, the Baron orchestrates a spectacle for the bloodthirsty audience!
The Baron is a challenging boss with several unique mechanics. The entire fight is divided into 3 acts, in each of which you smash cocoons in hopes that the weakest bloodsuckers will emerge from it. During this stage, healing is prohibited. When the Baron himself hatches from a cocoon, you'll have to withstand numerous hits across your entire team and experience a significant increase in stress.
To combat the Horror inflicted, stock up on Laudanum. Bandages will also come in handy. Before the battle, you can light a campfire using logs found in nearby rooms, so distribute camping skills in advance.
The most effective tactic in the battle against the Baron is the use of riposte. Take 1-3 classes capable of counterattacking, and the battle will end in your favor in record time.
Video: Two riposte equals to a very fast fight.
Viscount
A mutated glutton awaits you in the Crimson Court, and his appetite is insatiable.
The Viscount is accompanied by three suspended corpses. They won't act, but they still indirectly pose a threat. The thing is, the Viscount restores his health and strengthens himself in each round by eating one of these suspended bodies.
Experienced players resort to one of these two tactics to win:
1. Prioritize destroying the bodies to prevent the Viscount from healing and buffing. This is the most advantageous and safe approach if your team has good health and stress recovery while you deal with the bodies. This approach is more prolonged and is often suitable for a team that has explored the labyrinth of the current dungeon.
2. Quick elimination of the main enemy: the Viscount. This approach is risky, but justified if the heroes of your party have high damage. The Viscount has relatively low health, and a trio of successful critical hits will end the fight prematurely.
Countess
The Countess is the most challenging boss of the Crimson Court and the entire game. Adequate preparation is essential for facing her.
Let's start with the fact that the Countess has a record amount of health - 400 (480 on the darkest difficulty). Besides her health, her protection fluctuates between 10% and 40% depending on her form, significantly reducing the effectiveness of heavy-hitting classes like the Leper. Therefore, quickly defeating her with only attacking fighters isn't practical. Additionally, the Highwayman's riposte is ineffective against her most common attacks.
Another difficulty in battling the Countess is her unique debuffs in the form of eggs (or cocoons), which she imposes on your heroes. These eggs burst upon the hero's attack, dealing damage and applying a debuff.
A third unpleasant feature is her ability to shuffle your team. The Leper and Hellion will need solutions to avoid ending up in the back positions.
From these characteristics, the foundations for a safe victory over the boss emerge:
Attack with units capable of penetrating armor (Shieldbreaker) or causing bleeding (Flagellant). These units are also good due to their mobility - the Shieldbreaker can hit from any position, and the Flagellant moves forward by three tiles at once.
Focus less on attacking and more on defense and support. Vestal will be busy with healing, while the Houndmaster or Man-at-Arms will protect the attacking ally. With three support units, victory is guaranteed, but the fight could last up to 20 rounds. You can limit support group to one defender and one healer for a quicker battle, though.
Garden Guardian
Don't break the shield.
Other Bosses
The guides for the remaining five bosses are in the process of being written.

