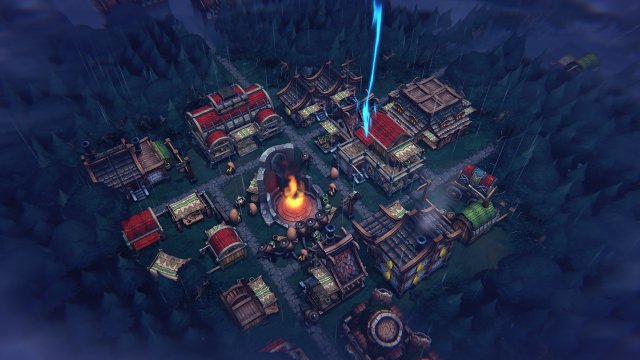
Sealed Forest Tips and Strategies
A complete Sealed Forest guide: learn how to reforge the final seal in Against the Storm. Tips and tricks on hostility management, fuel use, and species choice.
Updated by SinglePlayer in Against the Storm
What is the Sealed Forest
The Sealed Forest is the final biome required to complete a Blightstorm Cycle; think of it as a boss mission. It’s much harder than regular settlements and features unique mechanics.
How to Reach the Seal
Seals appear on the edges of the World Map. First, spend the cycle years building settlements, collecting Seal Fragments, and moving toward the Seal. Once your time is up, you must be within embark range to start the final mission.

Biome Features
- Hostility: Rises with each tree cut, not from Woodcutters.
- Beacon Tower: A unique building that provides temporary buffs for a season.
- Plagues: Devastating negative effects that occur during the Storm Season.
- Unique Victory Condition: Win by completing Sealed Orders instead of filling the Reputation bar.
Hostility Management
Hostility is the biggest challenge in the Sealed Forest biome. Cutting down too many trees too quickly raises it to dangerous levels. New players might not notice the threat at first - during the Drizzle and Clearance seasons, each level of Hostility only reduces Resolve by 2 points, which seems minor. But once the Storm Season begins and Resolve drops below 0, it’s hard to stop villagers from leaving.
Here’s how to manage Hostility effectively:
Selective Woodcutting
Prioritize cutting Overgrown Abyssal Trees - they require 20 chops to fell and raise Hostility 10 times slower than regular Abyssal Trees.
You can still cut some regular trees when opening glades or clearing space near the Ancient Hearth and Main Warehouse.
Wood Alternatives
Limit logging and avoid using Wood as freely as in other biomes. Try to use these fuel alternatives:
- Sea Marrow is a reliable early-game option. It drops as a secondary resource from trees or may appear in Glade nodes if you’re lucky.
- Oil is even better if you unlock a blueprint that produces it. Its ingredients are widely available, and later, you can sacrifice excess Oil at the Hearth for a production boost.
- Coal doesn’t spawn naturally, but if you find a Rainpunk Drill in a Small Glade and invest Tools or Parts, you’ll gain access to a steady Coal supply from mining.
Cheaper Plank Production
Avoid crafting Planks in the Crude Workstation - it’s highly inefficient. Aim to unlock a Lumber Mill, or at least a Carpenter or Workshop. If none are available, buy Planks from traders using profits earned through trade routes.
Cornerstone Choices
Some Cornerstones reduce Hostility under specific conditions. Here are the most notable ones:
- Protected Trade: -15 Hostility for every 30 Amber traded. This includes both Trade Routes and buying goods directly from a Trader. (Note: it doesn’t count purchases of Cornerstones or Perks.) If you put some effort into trading, this Cornerstone eventually eliminates the Hostility problem entirely.
- Baptism of Fire: -10 Hostility for every 3 Blightrot Cysts burned. A strong pick if you're planning to power your settlement with Rain Engines and have enough fuel for Purging Fire.
- Silent Looting: -15 Hostility per opened Abandoned Cache. Very effective on this map, since one of the Sealed Orders requires opening four caches.
Buildings That Lower Hostility
- Monastery: Highly effective during the Storm Season. Assigning three workers gives -100 Hostility. No service goods are required for the effect.
- Temple: Requires a steady fuel supply for Sacrificing, so it’s not useful early on but worth unlocking once you have excess fuel.
- Additional Hearths: Each Hearth reduces Hostility by -30. If you can afford the fuel upkeep, building one or two is a solid long-term move.
Preventing Hostility Gain
If you don’t have strong Cornerstones or Blueprints, consider slowing Hostility buildup:
- Cut fewer regular Abyssal Trees, as mentioned above in Selective Woodcutting.
- Avoid accepting too many newcomers - each villager increases Hostility by 6.
- Limit Glade openings - each Glade adds 30 Hostility (15 for Small Glades).
Beacon Tower

The Beacon Tower lets you call in powerful aid from the Citadel. These abilities are versatile and can help in various situations:
- Instant supplies when low on food
- Boosted production speed
- Faster trade routes
- Slower villager departure timer
- Reduced Hostility
- Faster Glade Event completion
The abilities are limited in number, so use them wisely. If things go off track, emergency support like instant Supplies or Resolve protection can save your village.
Plagues
Plagues are what make the Final Mission more difficult and unpredictable. Unlike Forest Mysteries, which only activate at certain Hostility levels and may have conditions, Plagues cannot be avoided - so your best option is to prepare for them.
The first three Plagues are always the same:
- The first one slows down production.
- The second increases food consumption and the time villagers spend resting.
- The third punishes poor Hostility management - if you've been careless, you’ll suffer heavy losses during an extended Storm, with no option to Sacrifice resources.
All Plagues after the third are random. That’s why it’s important to reach the Seal structure by the fourth year - it reveals the next upcoming Plague in advance, giving you time to prepare.
Ancient Seal

The Ancient Seal is the key to winning the game. Finding it isn’t too difficult - every opened Glade contains Guidance Stones that point toward it. The Seal is never adjacent to your starting Glade; there will always be at least one Glade in between.
Since you already know what the first three Plagues will be, there’s no need to rush toward the Seal. It’s often better to first stabilize your settlement by securing a steady source of food and fuel.
Another reason to delay uncovering the Seal is that Guidance Stones won’t appear in new Glades after it’s revealed. Until then, they serve as a source of Stone, which can be useful later for opening Caches.
Seal Orders
There are four quests to complete, each consisting of a fixed set of Seal Orders. These Orders are always the same, so you can plan your strategy ahead of time.
My Preferred Strategy
This is the approach I used to successfully reforge most of my Seals:
Since the condition is NOT retroactive, I avoid opening Caches early and leave them untouched until I’ve revealed the Ancient Seal. The Stone gained from deconstructing Guidance Stones is helpful, and I usually bring Embarkation resources to support this goal.
Trading is powerful in the game, especially during long missions where you’ll often have surpluses of some resources and shortages of others. I begin trading as early as the first Drizzle season and often take Packs of Provisions as an Embarkation bonus to accelerate this goal.
After establishing active trade routes with four nearby settlements, I typically accumulate plenty of Amber through profitable deals. Hitting 100 Amber is usually not a problem at this point.
By the time I reach this Level, my settlement is fully powered by a Rain Engines. With several buildings running at full capacity, it’s easy to accumulate 40 Cysts - especially on year 6, when you receive an extra 10. I build 3–5 Blight Posts to ensure I can burn them all during a single Storm. This method is especially effective on higher Prestige levels, where the number of Cysts is doubled.

An alternative approach I sometimes use is:
By year 5-6, I usually have enough resources to handle any Glade Event. Completing two Forbidden ones in a row is rarely a problem.
The third option - Keep Villagers' Resolve high for 5 minutes - is the most difficult for me, as I usually don’t focus on Reputation gain in the Final Mission.
Best Species for the Sealed Forest
Some species excel in this mission:
- Beavers - Their bonuses to Woodcutting and Plank production help offset the wood limitations on this map.
- Humans - Thanks to the abundance of Fertile Soil, farms are a very efficient food source here, and Humans are the best farmers. A Plantation or any other farm is a highly recommended Embarkation bonus. The Human Firekeeper’s 25% reduction to Queen's Impatience gain is also helpful if your settlement falls behind schedule.
Of course, these species aren’t required to win — any combination can work well depending on your strategy and preferences.
Conclusion
The Sealed Forest is a challenging mission. You may not always get lucky with Blueprints or Cornerstones - so don’t hesitate to rely on Beacon Tower aid and the Forsaken Altar - they’re there for a reason. Most importantly, don’t rush. Take your time and think through your decisions. Focus on stability first, adapt to unpredictability, and you will weather the Storm.


