Don't Starve Together Beginner's Guide
Your adventure starts here: enter the world of DST with our comprehensive guide. Learn about biomes, crafting, combat, and more. Perfect for beginners.
Updated by Single Player in Don't Starve Together
Intro
This guide is oriented towards Don’t Starve Together, not just Don’t Starve. I will not create confusion by discussing the numerous differences in mechanics.
Starting the Game
After logging into the game, you will see a menu offering to create your own server or join an existing one.
Game Modes and Settings
As soon as you enter the game, the first thing to do is go to the advanced game settings and disable lag compensation. This feature, although designed to smooth out animation on loaded servers, causes inaccuracies in displaying your character’s position.
Over time, you can disable screen shaking during earthquakes and visual effects during insanity if they start to annoy you.
Before creating a new world, you will be offered five preset settings templates, also known as game styles or game modes. Survival is the standard mode, and this guide is oriented towards its settings.
The game provides a multitude of options for world generation, affecting the number of enemies, available resources, the level of damage received, and much more. You can adjust them at your discretion. Don’t forget to enable Caves.
Character Selection
For beginners, I recommend the following three characters, each suitable for different play style:
Wilson is the default character and is perfect for newcomers. He doesn’t have any pronounced strengths or weaknesses, which allows you to focus on mastering the game’s basics.
Wendy is an excellent choice if you prefer exploration, resource gathering and base building over combat. Her ghost sister, Abigail, can handle enemies on her own, leaving you free to collect the loot. However, remember that by always relying on Abigail, you won’t learn much fighting.
Wigfrid is ideal for those who want to rush into battle as soon as possible. Her helmet provides cheap and reliable protection from the beginning of the game, and her spear is effective against smaller enemies like spiders and hounds. However, it’s important to note that Wigfrid follows an exclusively meat-based diet, so you will need to constantly search for meat sources.
Exploring the Map
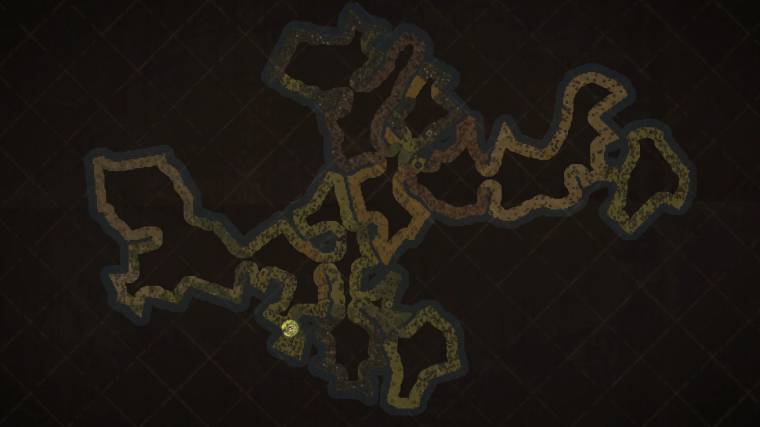
Worlds in Don't Starve Together (DST) are randomly generated and understanding the current map layout plays a key role in the gameplay.
The mainland is divided into various biomes, each with its own unique flora and fauna. More details about the biomes will be provided in sections below.
The world also features Wormholes, which transport you between different points. In a standard world, there are four pairs of Wormholes, and knowing their routes can save a lot of time when traveling.
There are Caves under the ground. Exploring this area is challenging due to the perpetual darkness, so it's wise to venture there only when you're well-prepared.
The mainland is surrounded by an Ocean, which has many interesting areas like Lunar Island and Monkey Island. However, navigating the ocean requires time and resources for building a raft, so it's advisable to delay sea voyages until you're more established.
Start exploring the world from the first day and continue to explore even at night, lighting your way with a torch. Knowing the locations of different biomes will help you in the future for gathering resources and choosing a convenient base location.
How much time you dedicate to exploration is up to you. Some players prefer to circle the entire continent, which can take up to half of the first Autumn, while others might only look for a few key objects of interest.
Resource Gathering
On your first time entering a newly generated world, you’ll spawn near the portal. The surrounding starting area will provide you with basic resources: twigs and grass. Aim to gather at least ten of each. These are used in crafting many items, but primarily, you’ll need them to make a torch, which will help you survive the night.
To craft your first tools, you’ll need flint. Find at least three pieces: two for crafting a pickaxe and one for an axe. Later, after you mine gold and stone from boulders, you’ll find that flint becomes more abundant.
Often, the starting area is adjacent to the Mosaic biome, where you’ll find plenty of scattered rocks and flint. Here, your goal is to collect some gold, so plan to spend at least two pickaxes on breaking Gold Veins – this should be enough for initial crafting.
In the first few days of the game, you can manage without food since your character’s hunger level starts off high. However, during your exploration, keep an eye out for berry bushes and carrots sticking out of the ground. This foraged food should suffice for a while.
After a few days of wandering and using Wormholes (each jump reduces sanity by 15), you may notice a decrease in your sanity. To avoid falling prey to shadow monsters, it’s important to keep your sanity high. Picking flowers increases sanity by 5, and consuming cooked green mushrooms or cacti restores 15. Additionally, learning new recipes raises sanity by 15.
Locating Biomes
Biomes in Don’t Starve Together each have unique characteristics and offer different survival conditions. Understanding the ecosystem of each biome will help you identify the resources available there, the potential dangers you may encounter, and the key landmarks within. In this section, I will provide a brief description of all the biomes in DST, focusing on details that are important for beginners.
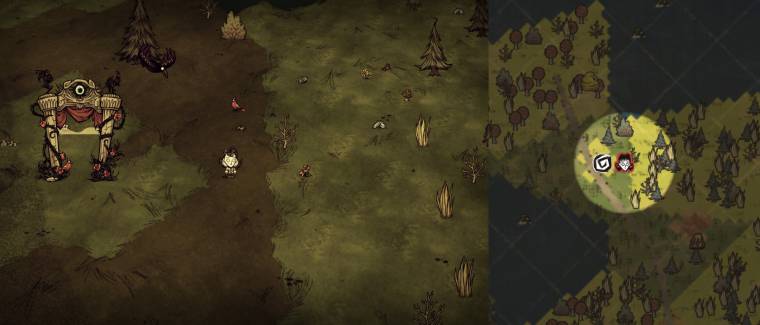
The Spawn Biome is one of ten guaranteed biomes in the game. Its key feature is the Florid Postern, more commonly known as the Portal. In Endless mode, the Portal allows players to resurrect after death, thus providing them with eternal life.
With some effort and resources, the Portal can be transformed into a Celestial Portal. This allows players to voluntarily change characters without losing a life. To modify the Portal, you’ll need to find a Celestial Orb and create Portal Paraphernalia.
Like the Spawn Biome, the following nine biomes are also guaranteed in every standard world.
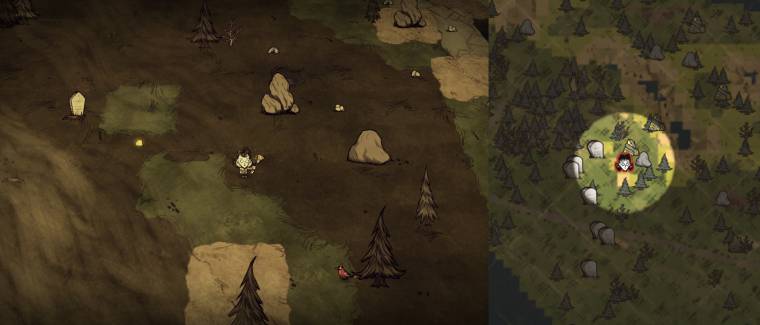
The Mosaic Biome, mentioned earlier, is an excellent source for initial gold nuggets gathering. It is characterized by small patches of various turfs, giving it its name.
Meteor showers occur periodically in this biome, leaving behind moon rocks, nitre, flint, and various types of boulders.
The Rock Den, usually located in the center of the biome, is used to adopt pets. Pets in Don't Starve Together play decorative role and do not provide practical benefits.
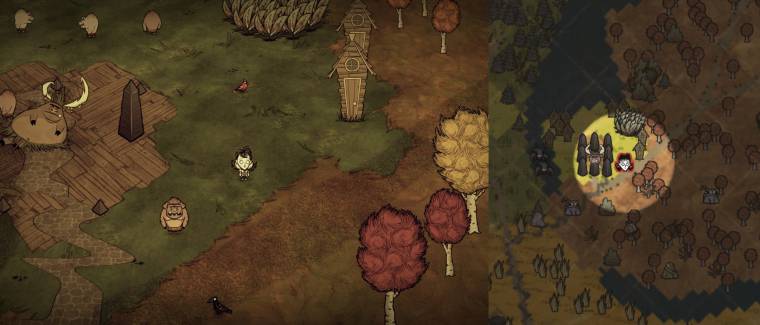
The Deciduous Forest is a relatively safe biome filled with Birchnut Trees. Pigs are the primary inhabitants here, and you can hunt them for meat. However, be cautious, as pigs have a herd mentality and will attack in a group if they see you attacking one of their own. Alternatively, you can befriend them by offering meat in exchange for their labor. The pigs will efficiently chop down trees for you throughout the day.
At the center of the Pig Village reigns the Pig King, a great source of gold. He trades meat and fish products for gold nuggets. Although he doesn’t accept monster meat, you can transform it into eggs using a caged bird and then trade these eggs for gold. Trinkets dug up from graves or found in Tumbleweeds yield even more gold upon exchange.
Another feature of the Pig King Forest is the Glommer Statue. Near the statue, you’ll find the highly useful Pan Flute that puts enemies to sleep. Glommer itself appears during the full moon (days 11, 31, 51, etc.) and becomes a source of goop, which can be used for emergency healing (at the cost of sanity) or as an efficient fuel for a campfire.
Catcoons, roaming the forest, are not very dangerous but can steal items left on the ground. If something is stolen, look for it in their Stumps.
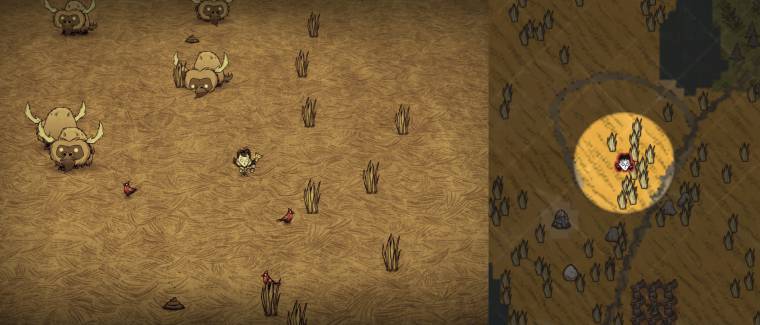
The Savanna in Don't Starve Together is a spacious and sparsely populated area. It is characterized by dry grass, with beefalos and rabbits being the prominent animals. For beginners, this place is relatively safe, especially during the first autumn when the beefalos are not in heat.
Beefalos are useful in many ways: their manure can be used as fertilizer for farms or as fuel for campfires, and their wool is essential for crafting warm winter hats. Therefore, it's a good idea to visit the Savanna before winter sets in.
You can tame Beefalo for riding, but taming requires significant time investment (around 20 in-game days) and food, so it's advisable to postpone the process until you've gained more experience.
Rabbits hiding in burrows can be a source of food if caught with traps. However, this hunting method is quite slow.
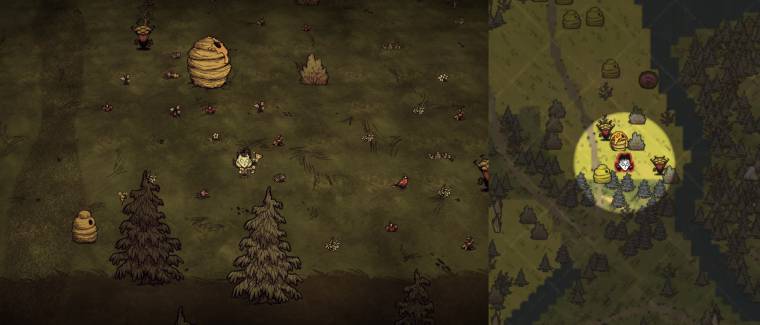
The main feature of this biome is a gigantic beehive in the middle of a flower meadow, surrounded by smaller hives. You can extract some honey out of the hive with a hammer, but limit yourself to a few knocks to avoid summoning the Bee Queen. This raid boss presents a challenging encounter for solo players. I will discuss strategies for defeating her in subsequent guides.
For beginners, this biome offers basic resources such as grass, twigs, berries, and carrots. Moreover, the flower meadow, strewn with dozens of flowers, is an excellent place for sanity restoration. This is worth remembering if you are being chased by shadow monsters.
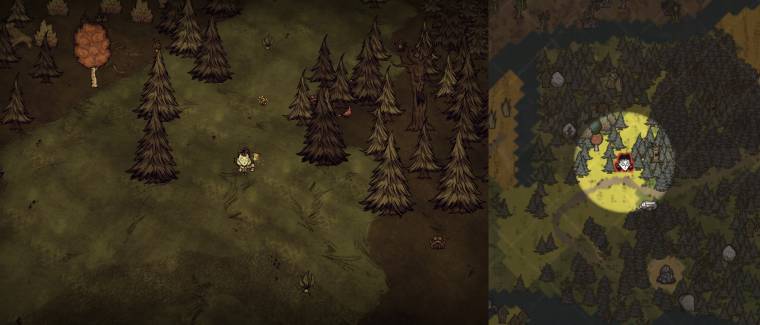
The evergreen forests in DST are covered with dark green turf. Here, you can encounter spiders living in their cocoons, and occasionally, you can find pig houses.
In these forests, in addition to the usual Evergreen, unusual trees grow, although they are called Totally Normal Tree. Chopping these trees yields Living Logs, essential for crafting dark swords and other magical items.
At least two forest biomes are generated in the game. One of them contains a meadow with Mandrakes. If you're lucky, you can pick up all four Mandrakes there. These plants can be eaten raw or cooked - they effectively restore health, but they are more valuable as an ingredient for creating Pan Flute later.
The Mandrake Forest always includes a section of the Savanna with a small herd of Beefalo.
Moreover, in this or any other evergreen forest, you can find a Conspicuous Chest containing a Terrarium - an item for summoning the Eye of Terror from Terraria.
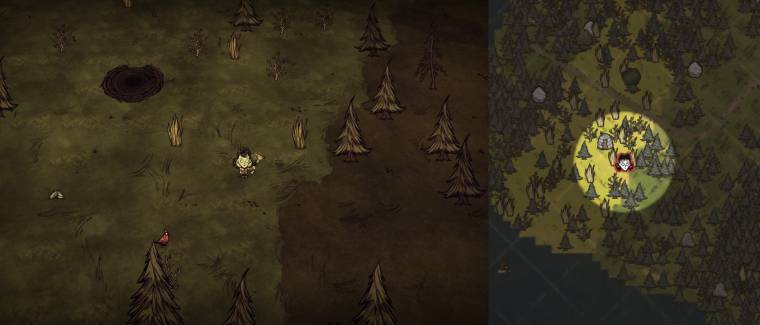
This forest is much like the previous one, but with some unique features. In the grassland part of it, you can find a spot for a future Walrus Camp (an Igloo). In the autumn, there’s nothing special here. But in winter, MacTusk and his son hunt here. They drop very useful loot, so be sure to visit the MacTusk family in winter.
In the middle of the forest, there’s a Lunar Platform. This structure serves to transform the Star Caller’s Staff during a full moon.
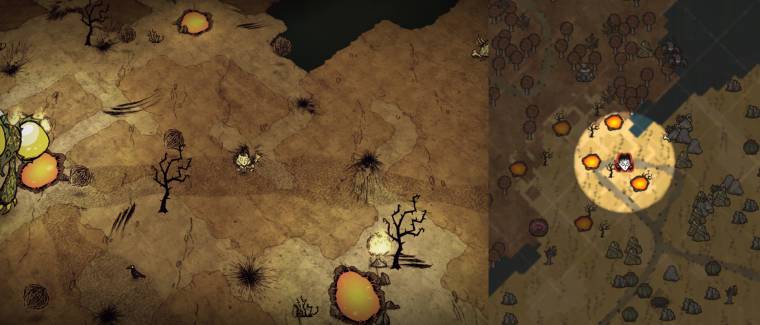
Deserts in Don’t Starve Together are distinguished by their sandy landscape. The main plants here are cacti, which restore sanity (+15) when cooked over a fire. There are also many flintless boulders from which stone can be mined. Each world generates two deserts, each with its unique features.
In one of the deserts, near the lava pools, resides the Dragonfly - a dangerous raid boss. Avoid this place for now.
Tumbleweeds rolling across the desert are excellent sources of twigs and grass. Occasionally, they may also drop other items, such as gears, which are useful for crafting Ice Boxes (fridges) at your base.
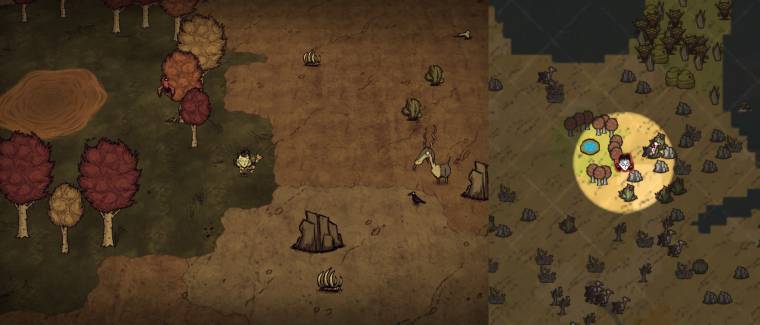
Unlike the Dragonfly desert, the center of this desert features an Oasis. The lake in the Oasis only fills with water during the hot summer.
This desert is inhabited by skittish Volt Goats, which behave neutrally except when struck by lightning (a common occurrence in spring).
Unique to this desert are the sandstorms that rage during the summer. To counteract this natural phenomenon, the game provides special desert goggles.
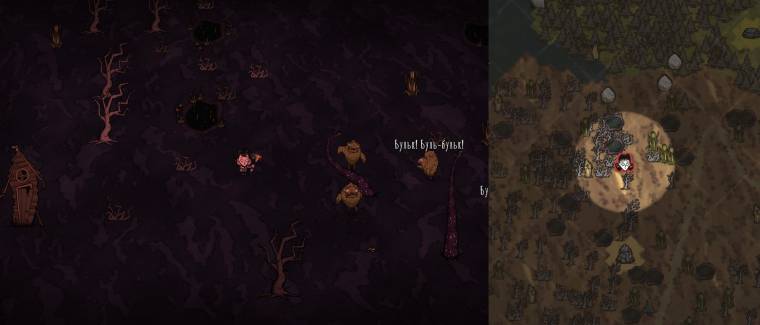
The Swamp is one of the most dangerous and inhospitable biomes in the game. The primary threats here are Tentacles, which attack suddenly and are nearly invisible, as well as aggressive Merms, who attack in groups. You can also find numerous spider cocoons in the swamp.
The Tentacles, Merms, and Spiders are in constant conflict with each other. You can safely watch these battles from a safe distance and collect loot afterwards. But always be cautious, watch the ground around you, and listen to the noises nearby, as sneaky Tentacles deal very strong blows. The safest way to move through the swamp is on roads, where Tentacles do not appear.
An important resource of the swamp is reeds, which grow throughout the biome. Collect 8 reeds to create a birdcage at the base and get eggs.
Random Biomes
In addition to the 10 guaranteed biomes, 5 random ones from the list below are added to the world:
Second Deciduous Forest
The second deciduous forest differs from the main one by lacking the Pig King. It also does not have Wormholes or entrances to the Caves. All this makes the second deciduous forest one of the most useless and dull biomes. You’re lucky if it’s generated on the edge of the map rather than in the center, complicating logistics.
Killer Bee Plain
This field is teeming with wild beehives. The red bees are very aggressive, but their attacks are easy to avoid due to their short attack radius. This biome can be confusing for newcomers as it is only connected to the main land by a narrow isthmus.
Rocky Lands
The Rocky Lands are a vast and lifeless territory: nothing grows or lives here, except for a couple of Tallbirds. Nevertheless, this wasteland is worth visiting at least once for the sake of mining minerals - the area is littered with boulders, and mini glaciers start to form as winter approaches.
Rocky Lands with Spiders
This biome differs from the previous one by having a large number of spider cocoons of various sizes. Walking here at night is dangerous due to the hordes of aggressive spiders. A small section of forest with evergreen pines makes this area more diverse, and gold nuggets lie directly on the ground.
Pig Village Forest
This vast forest is reminiscent of two others: the one with Mandrakes and the one with MacTusk. Its grassland area is rich with resources: pig houses can be dismantled with a hammer for refined materials, pigs willingly chop nearby trees in exchange for meat, and an abundant harvest of berries and carrots helps to satisfy any hunger. There is also a small swamp in the forest where you can sometimes gather eight reeds for crafting a birdcage.
Second Meteor Field
The part of the biome where meteors fall is almost devoid of turf. Surrounding it are plains with beehives, flowers, and various bushes, which will eventually be uprooted by meteor strikes.
Pond Grasslands
This biome is a plain with a large number of ponds (about 15) and occasional evergreens scattered around. Fishing in these ponds is highly productive, but it's best to do so in the evening or at night, as frogs during the day always a nuisance.
Frogs, Beehives, and Moleworms
Unsurprisingly, this biome is often confused with the previous one - it also has a plain with ponds. However, there are far fewer ponds here (6-8), and chestnut birches grow instead of evergreens. During the day, a small number of bees peacefully pollinate flowers, and in the evening, moleworm tunnels are dug underground. There are many moleworms here, about 20.
MacTusk Biome
The main advantage of this biome is the presence of three MacTusk camps, increasing the chances of obtaining valuable tusks. This is the most desired biome if you are playing with friends, as tusks from one guaranteed camp may not be enough for everyone. The territory is a combination of three landscapes - savanna, grassland, and rocky terrain. MacTusk igloos appear in each of these zones.
Moose/Goose Plain
This tiny biome is densely covered with vegetation typical for grasslands. Moose/Gooses (seasonal boss) arrive here in spring and lay up to 4 giant eggs.
Crafting
Crafting is a vital component of DST gameplay. Many useful items are created by the player, who needs to gather the ingredients according to the recipe for their creation.
Initially, the player can already create such simple tools as an axe, pickaxe, and hammer. After you have gathered the basic materials, namely twigs, grass, stone, and gold, chop a couple of trees with an axe to get logs.
Building a Science Machine unlocks new recipes. Once you've crafted an item at least once, you memorize its recipe (prototype) and can craft it without the machine.
Essential Items
With so many different items scattered around the world, it's no surprise that your inventory will fill up quickly. Therefore, the first thing to do is to create a backpack, which adds 8 slots for collecting items. Then, make a shovel, which is handy for digging up stumps and graves.
The next step will be to create basic combat gear. If you have twigs, flint, and grass for a rope, prototype a simple spear. Then, chop down a few more trees and make a wooden armor. Armor in DST is crucial - it reduces the damage received significantly. Wooden armor reduces damage by 80%, effectively making you five times tougher. Now you are ready for battle, which I will discuss in the Combat section.
After you've crafted everything necessary, dismantle the Science Machine with a hammer to reclaim half of the materials you used to build it.
Precrafting
Precrafting is a trick that involves spending resources to create a structure, but cancelling its placement. Why is this useful? Firstly, it frees up inventory space by using up resources. Secondly, it ensures you always have the necessary structure ready at hand.
Precrafting also works with campfires. If you suddenly run out of a torch and don't have any grass, you can place a precrafted fire and survive the night.
Advanced Crafting
More advanced items are crafted using the Alchemy Engine. It is more expensive but unlocks such useful items as a Football Helmet and a Ham Bat. The Football Helmet offers the same protection as a Wooden Armor, but its convenience lies in the fact that you don't need to take off your backpack. You can wear the helmet all the time and be protected from unforeseen attacks.
Fighting
Combat basics
Don’t Starve Together stands out from other games with its unique combat system. You don’t need to line up complex combos, roll, or parry attacks in time. The combat is based on a specific dodging called kiting, which goes through three stages:
- Provocation: Approach the opponent close enough to be within their attack range and provoke an attack.
- Dodge: Quickly move out of the enemy’s attack zone to avoid the hit.
- Counterattack: Return to the enemy and deliver strikes during their attack cooldown.
Kiting requires agility and skill, but it's not the only way to deal with enemies. Alternatives include using traps, recruiting other mobs, or employing catapults. Another very effective way to handle monsters is tanking, standing still and hitting the enemy, enduring their blows - decent armor and timely healing can make kiting a waste of time.
Enemies
Kiting varies depending on the type of mob. Some, like bees, have a short attack radius, allowing the player to simply step aside to dodge. Conversely, some bosses require the player to run for a few seconds to escape their attack range. The number of counter-strikes you can deliver depends on the mob's attack speed.
The simplest mobs, such as spiders, bees, and mosquitoes, can be stunned: your attacks will interrupt theirs.
Below, I will provide an example of kiting mobs that are commonly encountered.
Regardless of how pacifistic you are, you will have to deal with the hounds - they raid players every 5-15 days. The first raids aren't too dangerous - you will have to deal with just a couple of monsters, and even a spear or an axe will suffice if you follow this pattern: provoke a hit, back off, strike twice, then back off again and repeat.
Over time, the number of dogs will grow, so stock up on armor, weapons, and healing items. It's recommended to switch to a weapon dealing over 50 damage - this way, you will need only 3 swings to kill a regular hounds, which have 150 health.
After 100 days, the number of hounds will become overwhelming, and a Varglet with a high health pool will join the raid. Therefore, players must definitely prepare some kind of defense. One of the simplest and most effective ones is the Tooth Trap.
In the world of Don’t Starve, pigs hold an iconic status. These pink friendly creatures can provide companionship even to the loneliest of players. They are also a good source of meat, and I will show how to kill three types of pigs: regular, guards, and werepigs.
Regular pigs are scattered throughout the world - they inhabit forests, with their largest settlement found in the village near the Pig King.
Guards protect the Pig Torch and are extremely aggressive. If there are many torches, it's better to steer clear of their territory as they have high health and attack in groups.
Pigs turn into werepigs during a full moon or after feasting on four pieces of monster meat. Werepigs drop three times more resources when defeated.
There are hundreds of different mobs and dozens of bosses in DST. I recommend mastering an important skill for kiting: switching your weapon to a walking cane. This will significantly increase your speed, allowing you to land more hits with each approach.
Healing Wounds
Always keep your health at a high level, close to the maximum. Don’t wander around with low health until a sudden bee sting becomes fatal; recover after every battle. There are many ways to heal in the game:
- Spider glands (8 HP)
- Healing salves (20 HP)
- Butterlies (8 HP)
- Honey poultice (30 HP)
- Raw blue mushrooms (20 HP)
- Crockpot food (up to 150HP)
- Sleeping in a Tent
Base Building
This section is a work in process.
Optimal Location
Avoid locations where meteor showers occur.
Essential Buildings
No base can do without these structures:
- Campfire
- Alchemy Engine
- Crock Pots
- Ice Box
- Lightning Rod
- Ice Flingomatic (for summer)
Summary
Let's recap the key points we've covered in this guide:
- Explore the world during your first days, both day and night.
- Keep essential materials on hand for crafting tools and torches.
- Always equip armor before encountering enemies.
- Heal back to maximum after losing health.
- Experiment and learn new things.
Conclusion
Don’t Starve Together is a unique and complex game with a vast knowledge base. I have only described a small part of the game's features, but I hope it helps you take your first steps.
Remember, there's no right way to play DST. Each player develops their own strategy that suits their style of play. Experiment, explore, and most importantly, have fun!

